Slow Cooker Angel Chicken

It’s spring here in New Jersey, but it sure doesn’t feel like it! The high today is 41º, but the strong wind makes it feel more like 20. These frigid temperatures have me reaching for my slow cooker to make some hearty comfort food for me and my family. A favorite in my household is Slow Cooker Angel Chicken. I found this recipe on Pinterest years ago and I’ve been making it ever since. It’s probably my husband’s favorite meal I make, and the kids really enjoy it too. It’s so easy to prepare, and the best part is I can throw it all together before anyone wakes up and by dinner time all I have to do is serve!

Ingredients

  •  4 boneless, skinless chicken breasts
  • 1 8oz package of sliced mushrooms (my husband LOVES mushrooms so I actually use 2 packages)
  • 1 can of condensed golden mushroom soup
  • 1 stick of butter
  • 1 packet of dry italian salad dressing mix
  • 1/2 C chicken broth
  • 1/2 of an 8oz tub of chive and onion cream cheese
  • rice

Directions

  • Melt butter in a saucepan and add the italian salad dressing packet. Stir in the soup, chicken broth, and cream cheese until it combines and melts.
  • Place the mushrooms in the bottom of your crockpot and place the chicken breasts on top.
  • Pour the sauce mix on top of the chicken, cover with lid and cook on low for 5-6 hours.
  • Serve over rice (or pasta if you wish!)

I hope you all enjoy this as much as we do! I would love to know if you make this. Comment below and let me know if you made this, or what your favorite crock pot recipe is!

XOXO- Kelly


One Pan Chicken Dinner

I am constantly looking for easy to assemble dinners for my family. With the boys now on the move, I really can’t spend a lot of time in the kitchen. My friend Erin gave me this recipe and it’s a family favorite! It’s super easy to put together and very low maintenance. Once it’s all in the pan you pop it in the oven and that it! Nothing left to do but wait for it to cook then serve. I hope you will love it as much as we do!!

Ingredients

  • 3-4 chicken breasts (we usually filet the chicken breasts into smaller pieces)
  • 1 can green beans
  • 5-6 red potatoes diced into medium sized pieces
  • 1 stick of butter, melted
  • 1 packet of Italian dressing mix
  • French fried onions

Directions

Spray glass cooking dish with Pam. Line the chicken breasts down the middle of the pan. Place diced potatoes on one side of the chicken and the green beans on the other side. Sprinkle Italian dressing powder all over chicken, potatoes and beans. Pour melted butter on top of everything and cover with tin foil. Bake in a 350° oven for about 60 minutes. 


 After 60 minutes uncover, sprinkle with French fried onions and bake for another 5-7 minutes. Remove from oven and serve! 


Enjoy! If you make this please let me know what you think!

XOXO- Kelly

Twin Tuesday: Registry Edition

Twin Registry must haves
I can finally share the exciting news that my sister-in-law is pregnant! Not only is she pregnant, but she is pregnant with…TWINS! We are so excited to add another set of twins to our family and for my kids to have cousins. I was ridiculously close with my cousins when I was growing up, so I’m thrilled for my kids to get to experience that and hopefully have a bond with their cousins like I had and have with mine.

My sister-in-law is about 17 weeks now and is starting to think about registering. Since I am a fellow twin mom, she asked me to let her know what my registry must haves would be for twins. I was more than happy to share with her and figured some other mommas would want to know as well!

One. My Brestfriend Twins Plus Nursing Pillow– I was lucky enough to be able to breast feed all of my babies and without this amazing pillow, I don’t know if it would have been as easy to breast feed the twins. It’s nice and big and clips around your back for support and stability. It even has a little back support for momma which was really nice when I was just exhausted. They really kept both momma and her babies in mind while designing this pillow and you can tell. Both my boys fit on here the whole time we breastfed. Being able to breastfeed them at the same time was huge for me because it was a real time saver and I don’t know what I would have done if I would have had to breastfeed them separately. If I could pick only one item to have for my boys during the first year, this pillow would be it!

Two. MyBaby by Homemedics SoundSpa– Both of my boys spent time in the NICU so I knew expecting them to sleep in a silent room wasn’t going to happen. I picked this up and love it. It has multiple choices for the noise you would like such as rain, ocean, heartbeat and more. There is a volume control so you can have it as loud or as quiet as you would like. Another awesome feature is that it has a rotating picture projector which projects a cute picture on the wall or ceiling. It comes with three image discs to choose from. I loved this feature because when we put the boys in their own room it made it so it wasn’t pitch black and I was able to see when I went in there in the middle of night. We still use the Soundspa to this day!

Three. Boppy Pillow– I think even if you don’t have a baby you know about the Boppy. It’s such a versatile item and I don’t think any baby registry would be complete without it. It was great for us because both of my boys had reflux and the Boppy propped them up nicely and made them comfortable. It was great having two of these in the bed during the day so I could prop them up and play, sing, and read and be able to really see and interact with them both.

Four. SwaddleMe– I LOVED these for Ashley and I loved them just as much for the boys. All three of my kids liked to be swaddled and these made it SO easy. They do teach you how to swaddle before you leave the hospital but the SwaddleMe makes it so much easier. It has velcro pieces that make it so simple, even daddy can do it! A great feature is the leg pouch pops open to make for easy diaper changes without having to unswaddle the baby! They have so many adorable fabric options to choose from and even offer a line with organic cotton. They wash well and hold up perfectly throughout the entire time you swaddle. I love love love these.

Five. Medela Pump In Style Advanced Breast Pump– Even though I did breastfeed exclusively, this pump was really needed during the first year. Trying to get my supply regulated with two babies took a little time and being able to pump when I got engorged to relieve some pressure, or pumping to increase my supply a bit was invaluable. The best part was I was able to get this for free through insurance!

Six.Skip Hop Duo Double Deluxe diaper bag– When I found out I was having twins, I knew I would need an awesome diaper bag. I did a lot of research and asked every twin mom I came in contact with. The majority of the feedback I received was for the Skip Hop duo deluxe. I took everyones advice and I could not be happier. We LOVE this diaper bag! It has  4 exterior pockets, multiple interior compartments, a bottle pocket and a cell phone pocket so you can keep everything you need to be comfortable and organized. An adjustable shoulder strap lets you carry it in comfort, or fit it to the width of your strollers handles. I think my favorite feature are the side clips that allow you to clip it onto the stroller. The inside can be wiped clean in case of any messes and it comes with a changing pad. I can’t say enough great things about this bag.

Seven. Fisher-Price Newborn Auto Rock n’ Play Sleeper– Like I said before, both of my boys had reflux and would spit up almost instantly if they were laid flat after eating. I decided to give these a shot and they were the best. The inclined sleeper was a life saver and the boys slept soundly in them from the first night we used them. It has an extra deep seat that helps baby sleep all night long and with the push of a button, the sleeper helps the baby relax with two different rocking speeds! These were compact enough to fit next to the bed and it was so easy to get them for nighttime feedings. The seat pad is machine washable, and can be put in the dryer! I was sad when the boys were too big to use these anymore!

Eight. aden + anais swaddle plus blankets– These blankets are so versatile and can be used for so many things, I don’t think you should ever leave home without them. We used them for swaddling, covering the car seats while outside, tummy time, a lightweight blanket for the car seat, a burp cloth, using as a barrier for a quick change, and that is just the beginning! These blankets can be used for literally anything and I don’t think any new mom (or really any mom for that matter) should leave home without them!

Nine. Burt’s Bees Baby Bee Shampoo & Wash– I have talked about this wash before but we love it so much I had to mention it again. Both Adam and Collin have eczema and this wash was the only thing I could find that wouldn’t completely dry out their delicate skin. It smells delicious and is 98.9% natural which is awesome. I still use it on them and will continue to do so forever!

XOXO- Kelly


Pumpkin Bars

Since we celebrate Thanksgiving with my side of the family, my Mother-in-law likes to have a pre-Thanksgiving celebration at her house. It’s great because it lengthens the holiday and we get to celebrate the holiday with everyone! This year she asked me to bring a dessert so I decided to bring pumpkin bars! They are easy to make and absolutely delicious. They are the perfect fall treat and would be a great addition to any celebration you might have. Or great for relaxing at home and watching movies (which is what my husband begged me to do instead of bringing these for everyone to enjoy haha!)

Ingredients:

  • 4 eggs
  • 2 C sugar
  • 1 C salad oil
  • 1 large can of pumpkin
  • 2 C flour
  • 1 tsp baking soda
  • 1/2 tsp ginger
  • 2 tsp baking powder
  • 1/2 tsp salt
  • 1/2 tsp ground cloves
  • 2 tsp cinnamon
  • 1/2 tsp nutmeg

Directions:

Mix eggs, sugar, oil and pumpkin in a large bowl until combined.

12244222_10205651727915990_358430122_n

Sift or mix flour, baking soda, ginger, baking powder, salt, cloves, cinnamon and nutmeg.

12233442_10205651727555981_480724053_n

Combine wet and dry ingredients. Mix well.

12231638_10205651727315975_1810767473_n

Pour into a greased 12×18 inch pan and bake at 350º for 25-35 minutes.

12244099_10205651727155971_240280092_n

Remove from oven and let cool.

Frosting:

  • 6 oz package cream cheese (room temp)
  • 3/4 stick softened butter
  • 1 tbsp milk
  • 1 tsp vanilla
  • 4 C powdered sugar

Beat cream cheese, butter, vanilla and milk together until soft. Slowly add powdered sugar until correct consistency to spread.

Spread the frosting and cut into bar shapes.

Unknown

Enjoy! These will definitely be a fall staple in our house from now on. If you make these I’d love to hear how you liked them!

XOXO- Kelly

Aladdin on Broadway

One of the best things about living in New Jersey is being so close to New York City. We get to experience all of the amazing things the city has to offer, while being able to live in the quieter suburbs. My favorite thing to do in the city is most definitely getting to see some pretty amazing shows. Ever since I was a little girl and my Grandma took me to Radio City to see the Christmas Spectacular, I was hooked. So when my Mom told me she wanted to take my sister, Ashley and I to see Aladdin I was beside myself with excitement. To add to the thrill of it this was going to be Ashley’s first Broadway show ever! We impatiently counted the days and this past Sunday was finally the day! We had such an unforgettable time with each other and the show was even more fantastic than I imagined (if that’s even possible!)

We had tickets to the one o’clock show so we decided to grab an appetizer at The Heartland Brewery while we were waiting to head to the theater. Ashley had her very first Shirley Temple which she loved and we decided to order the warm giant pretzel with honey mustard. It was so delicious and literally the biggest pretzel I had ever seen!

12212569_10205623150841581_1425492590_n

12231195_10205623174122163_1379776148_n

12231099_10205623233203640_1404617573_n

After we finished our drinks and pretzel we headed over to the New Amsterdam theater!

12231341_10205623819738303_1191885251_n

Walking to the theater! During the walk Ashley couldn’t stop saying “Wow, I just love New York City!” She was enamored with the sights, sounds, and buzz of the city. I don’t blame her 🙂

When we walked into the theater and the usher brought us to our seats I couldn’t believe my eyes. We were four rows away from the stage. FOUR. It was the closest to the stage I’ve ever sat.

12226287_10205624238628775_965797833_n

We settled into our seats and got ready for the show to begin!

12226616_10205623816138213_428777052_n

12231402_10205623816338218_436357868_n

12208249_10205623816978234_1938063723_n

Finally the lights went dim and the curtain went up! You’re not allowed to use your phone but I was able to snap these photos of Ashley when she saw the performers come out and the show begin. Her face says it all. I think this will be the first of many shows Ashley attends.

12233424_10205624238268766_310891100_n

12231297_10205623814658176_1680812269_n

The show was beyond incredible. The singing and dancing was impeccable and the scenery was incredibly elaborate. I was pulled into the story from the moment the first note played from the orchestra. In the end, I couldn’t help but cry. Like I said, you’re not allowed to take pictures but here are some from the Aladdin the Musical website.

_628.3717.Aladdin786

13.10_Aladdin2460g786

_628.3784.Aladdin.01

_D8M9131786

I can’t say enough great things about this show. If you are in New York I HIGHLY recommend you check out this show. I promise, you will not regret it!

After the show, my Mom was so nice and bought my sister and I a magic lamp ornament! I started this tradition to buy an ornament for the Christmas tree whenever I go on vacation, or to a really fun place that I want to remember. My idea is that our Christmas tree will be a tree of memories. So each year when we are decorating and unwrapping each ornament, we get to relive that memory all over again. It’s really fun and this magic lamp is the perfect addition to my collection!

12231330_10205638729991050_1270914495_n

12233338_10205624181627350_352583140_n

The entire day was fabulous. My Mom, sister and I are so close and I really treasure the relationship we share. Understandably we are all very busy so it’s not often we get to spend an entire day together. Being able to do something so special together and to be able to include Ashley was amazing. We laughed so much and really enjoyed each other’s company. I’ll fondly remember this day for the rest of my life.

XOXO-Kelly

The Ultimate Cinderella Party

My sweet girl turned five this past August. How did that happen? I honestly cannot believe how incredibly fast these past 5 years have flown by.This birthday of Ashley’s was especially emotional for me. This was the first full year that Ash wasn’t an only child and she really amazes me with how great of a big sister she is. She is so gentle and loving with her brothers and is always willing to help me out. I thank God for her every single day and I feel like the luckiest woman in the world that He chose me to be her mommy.

When we went to Disney World in April and we had a really fun experience with Cinderella. Adam and Collin were eight months old when we went and understandably there wasn’t a whole lot they were able to participate in. One night we went to dinner at Cinderella Castle. Before your reservation you are escorted into a beautiful room to meet, chat with and take a picture with none other than Cinderella herself. Earlier in the day Ashley had gone to Bibbidi Bobbidi Boutique and was dressed up like Cinderella so she was beyond excited to meet her. When we walked in, it was picture perfect. Cinderella gave Ashley the biggest hug and Ashley was just in awe of her. Bill and I were each holding one of the boys as we watched Ashley have an adorable conversation with the princess and all of a sudden Cinderella turned to us and excitedly said “are they twins!?” I told her yes and she rushed over to them! Collin smiled ear to ear and reached out to her. Now, normally the characters aren’t really supposed to hold babies but Cinderella absolutely insisted. She exclaimed “give me those boys!” I said to her “are you sure?!” and she replied ‘Yes of course! Give them to me!” I couldn’t believe it. I was unable to stop the tears as Cinderella sat down, held each baby on her lap and Ashley to her side. The boys just loved her and she was incredible with them. It was such an amazing experience and a memory I will treasure forever. The next night we had dinner at a restaurant called 1900 Park Fare in the Grand Floridian Hotel. It was called “Cinderella’s Happily Ever After Dinner” and while you’re dining Cinderella, Prince Charming, the Evil Step-Mother and the Ugly Stepsisters visit at your table for pictures and autographs! So we sat down to eat and beautiful music started playing. Cinderella and her Prince waltzed into the room and started visiting tables. Cinderella spotted us and I realized it was the SAME Cinderella from the night before! She rushed over to us and squealed “My boys Adam and Collin! And my princess Ashley!” I could not believe it. She remembered the boys and they certainly remembered her. Ashley was speechless. I felt so honored that someone who sees thousands of kids a day remembered us. It was true Disney magic and these interactions literally made our entire trip.

1907520_10204442093795893_1611945395613104302_n

Needless to say, since then Ashley has been enamored with Cinderella so I wasn’t at all surprised when she told me she want to have a Cinderella birthday party. I was so excited because I had already anticipated that is what she would want and my wheels had been turning thinking of invitations, centerpieces, games and desserts! Everything turned out beautifully and it certainly was a party fit for a princess!

IMG_1322

I loved everything about this invitation. I loved the glitter and the gold scrolling around the party details. It felt very regal to me and that was exactly the look I was going for. We used the picture of her dressed up as Cinderella from Disney!

For the centerpieces I couldn’t find a picture of exactly what I wanted so I improvised. I printed out pictures of Ashley in her Cinderella dress from Disney, and a picture of Cinderella herself (the same one that was on the invitation). I printed out a big 5 in the font I wanted on card stock and used that as a stencil. I bought some scrapbook paper in a package that came in different shades of blue and I traced and cut out the 5 on some light blue paper. I then cut out a frame in a darker blue and glued the 5 to it. To finish I outlined the 5 in blue glitter and hot glued everything onto very small wooden dowels. I stuck some floral foam into fancy small buckets I got from Party City for .99 and stuck the dowels into it. I completed the look with some shredded light blue crinkle paper. I adore how they turned out!

Center

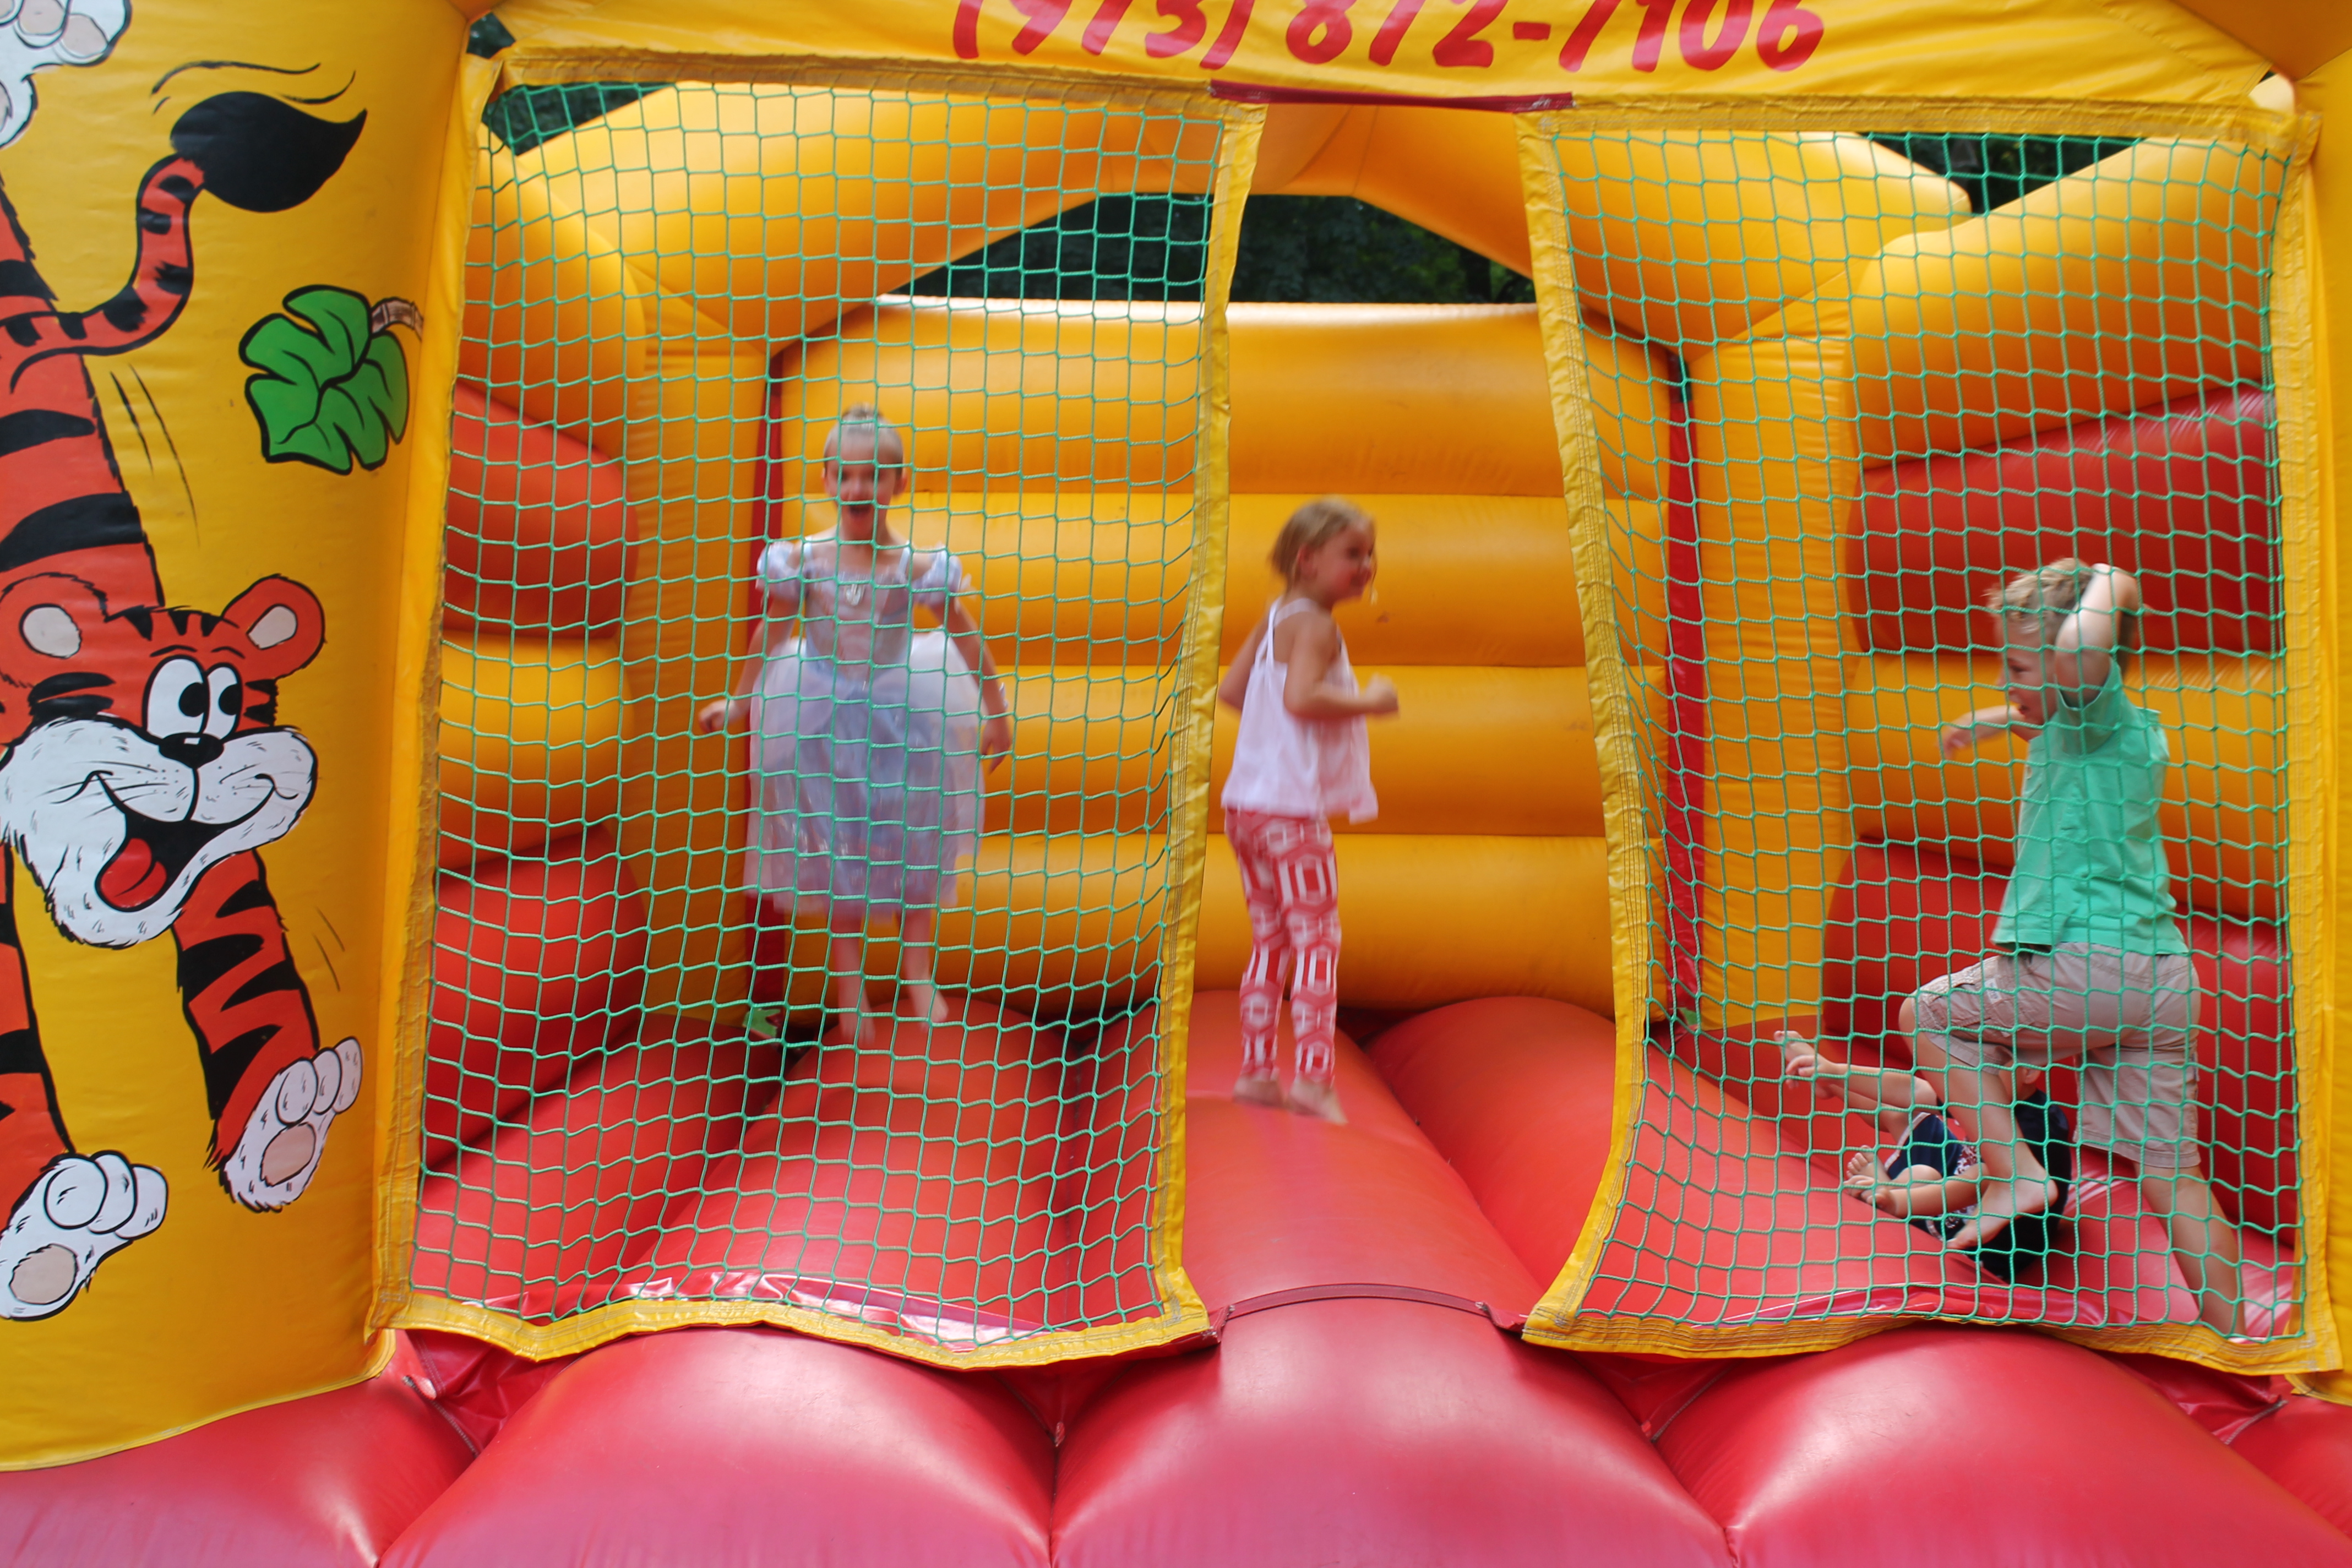
Our friends actually own a bounce house so we like to borrow that for Ashley’s parties. The kids LOVE it and they burn off so much energy so it’s an excellent addition to the party.

IMG_9634

I love this picture of Ashley, mid jump!

IMG_4783

As a surprise for Ash, we hired Cinderella to come to her party! This woman is so great and we have had her before for Ashley’s 3rd “Rapunzel”birthday. She is so sweet, does a parade with the kids, reads a story, does face painting and sticks around to sing to the birthday girl. Ashley was beside herself when Cinderella appeared in the yard. My heart practically burst wide open when Ash ran to her and gave her the biggest hug. Bill even got a little chocked up!

IMG_9648

IMG_9653

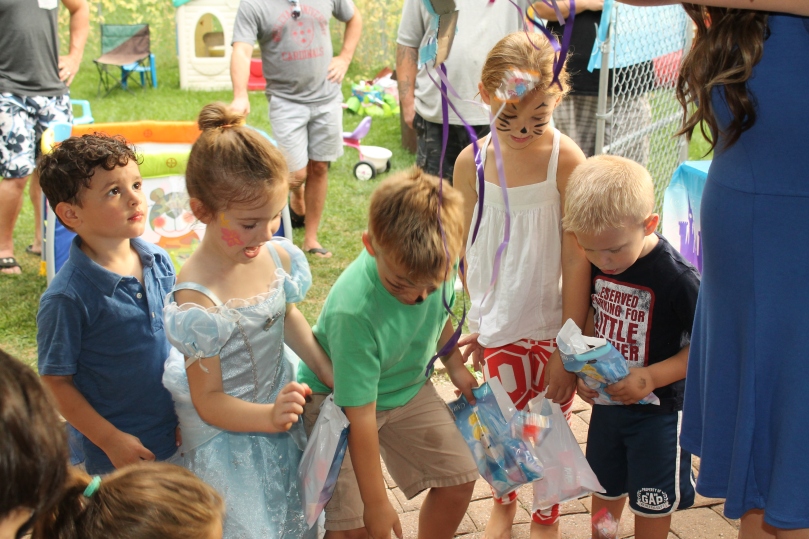
After Cinderella greeted everyone, it was time to get down to business! Cinderella led everyone in a princess parade!

IMG_4804

IMG_4826

Ashley had such a great time with her.

IMG_9687

My beautiful baby with her face painted.

After they sang, danced,heard a story and had some face painting, it was time for dessert! I envisioned a beautiful blue and pink dessert table set with the most princess-y desserts I could think of. I printed out a beautiful personalized Cinderella banner from an Etsy shop and I think it added the perfect touch.

IMG_9633

IMG_4844

I added some Cinderella toys we had to the table for a little extra theming. For dessert we had:

Fairy Godmother’s wands

IMG_4842

The wands were pretzel sticks dipped into light blue candy melts with white sprinkles. These are SO easy to make and always such a huge hit. We never have any left. The great thing about them is they can be made a few days in advance which is huge for me. Anything I can get done ahead of time is a big help. I make them and store them in an airtight container in the fridge. The candy melts are really easy to work with and dry quickly. I love these and try to incorporate them in every dessert table I do!

Next we had pumpkin cake pops!

IMG_4841

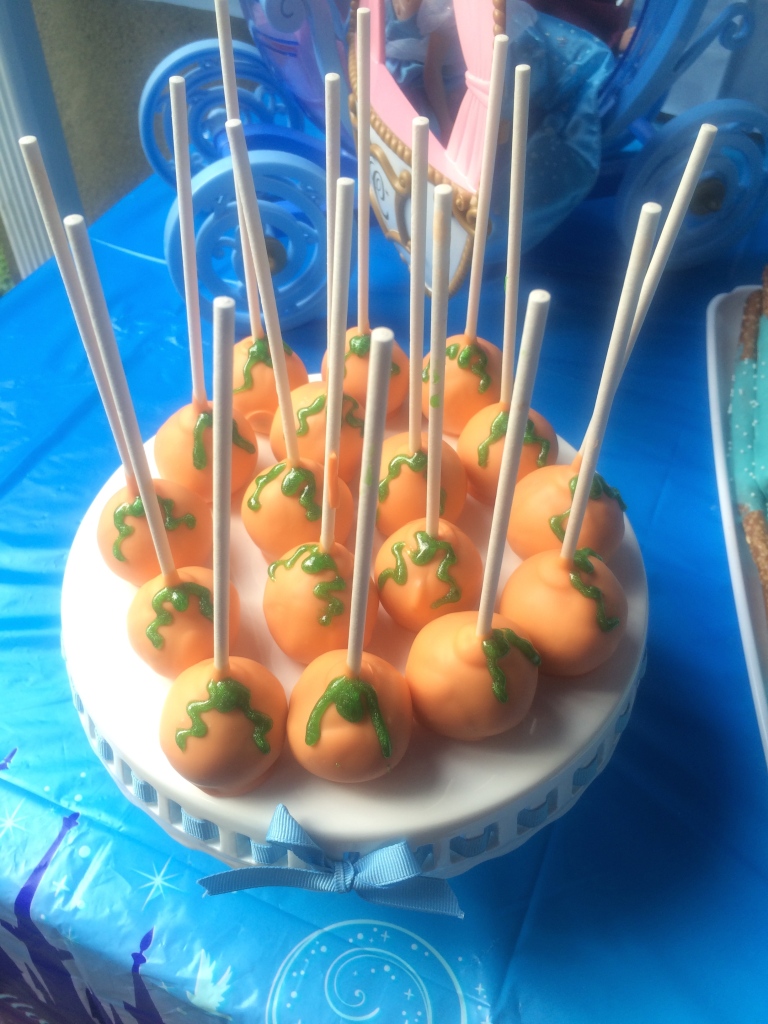
These were also so easy. I made the cake pops and dipped them into orange candy melts and used some sparkly green gel icing for the leaf and stem. These can also be made in advance!

Rice Krispie treats are an absolute favorite among our guests and I couldn’t think of a cute way to tie them into our theme. All of a sudden it popped into my head! Glass slippers!

IMG_9694

I used a shoe cookie cutter and pressed them into the pan of Rice Krispies and voila! I added some blue sparkle gel icing around the edge to define the shape. They were cute and tasted delicious. These flew off the tray almost as fast as I put them out.

I like to have symmetry on the table so I knew I needed one more dessert. I really couldn’t find anything I loved so I began wracking my brain. I then found a blog on  that made Cinderella Princess popcorn and I KNEW that’s what I wanted to do. I made the popcorn according to the directions on the package then stirred in some blue candy melts, sprinkles and mini marshmallows! Everyone LOVED it. My brother-in-law kept coming up for more! I was thrilled.

IMG_9695

I poured it into a blue bowl I purchased from Party City and set it on the table. I think it really completed the desserts and I loved how we had a variety of things to choose from.

Last but certainly not least was the cake!

IMG_4839

My good friend Dani has made cakes for every special occasion I’ve ever had. I started working with her for Ashley’s first birthday party and will continue to work with her as long as she is baking! Her cakes are not only SO beautiful, but SOOOO delicious. I’ve seen a ton of cakes where they look gorgeous but aren’t very tasty. Her’s are both and I love the work she does. I have a vision and I usually send her some crazy sketch I make and she 100% delivers. I can’t say enough great things about her! I just love the bows and ribbons on this cake. It was exactly what I wanted and I love how it turned out.

IMG_9716

IMG_4864

IMG_9713

We sang and my sweet girl blew out her candles. I CANNOT believe she is 5!

After the cake and dessert we had one more activity for the kids- a pull-string piñata!

IMG_4786

IMG_9731

IMG_9737

Ashley was so excited about this and was seriously waiting all day for it. I was happy no one was waving around a huge dangerous stick to break it, but still got the whole piñata experience. The kids had a great time and that made all of the hard work beyond worth it!

IMG_4857

Happy 5th Birthday my beautiful girl! We love you more than you will ever know! ❤

XOXO-Kelly

Twin Tuesday

It’s no secret that when you have a baby, you need a ton of stuff. So you can only imagine how much stuff you need when you have TWO babies. As time goes on you figure out what you really need and use. I think my favorite thing that we absolutely use the most is our Contours Double Stroller.

Contours-Options-Elite-Tandem-Stroller--pTRU1-22578249dt

I get asked about it every time we go out and I cannot say enough great things about it. When we found out we were having twins I started to do research on double strollers but found very conflicting information. I guess it really boils down personal preference. For me, I knew I wanted a tandem stroller as opposed to side-by-side. Navigating through aisles in stores with a side-by-side stroller might be one of the worst things on the planet and I knew that wasn’t something I wanted to deal with. So, when I was about 5 months pregnant we were at our town Easter egg hunt I met a lady who had twins as well and she had this incredible stroller. She showed me how it worked and how easy it was to assemble and disassemble and at that very moment I was sold. My favorite thing about the Contours double stroller are the seats. They click into the frame and can be put into any position you choose. They can both face forward, both face backwards or face each other (which is my preferred way). I love that I can have the boys face each other so they are always entertained 🙂 . Another great thing about the seats is that no matter what position they are in, they are always able to fully recline making it so easy for the boys to take naps while we are on-the-go. The canopies on top are larger than any I’ve seen and come down really far, which was a great addition for when we were in Disney and it would begin to down pour out of nowhere. I was able to quickly flip them down and the boys stayed nice and dry! Now that the boys are older we always use the seats, but when they were smaller we were able to use car seat adapters, which made it possible for our car seats to attach and be secured to stroller. It was so easy to snap the car seat in without having to unbuckle them and take them out of the car seats. The stroller is so easy to push and it’s a really smooth ride. The basket underneath the stroller is huge which is an absolute necessity for me because I have to use that to hold my groceries when I go food shopping. The stroller folds up quickly and fits in my trunk with room to spare. We love our Contours and I know we will get many years of use out of it! Here are some pictures of my boys enjoying our stroller!

10155258_10203126999119348_1451120199574600145_n

Brand new baby boys!

75948_10203294262140819_2454619566401849462_n

Strapped in nice and snug!

10632844_10204597358037402_5187432626792733602_n

12003269_10205353173012304_7877780570396121532_n

I’d love to know, what is your favorite baby item? Comment below!

XOXO-Kelly

Halloween!

The kids are finally bathed and asleep after a candy filled, perfect Halloween and Bill and I are about to watch his favorite Halloween movie- Mr. Boogedy! I couldn’t have asked for a better day. We woke up and I made the kids a special Halloween breakfast. Even before I had kids I dreamt of doing things like this. I would always think about all the fun things I would do for my children to make the holidays special for them, and now finally being able to do all of the things I planned so many years ago, is a really wonderful feeling. Ashley was absolutely thrilled when she saw her breakfast waiting for her, she talked about it all day.

12200971_10205587102060384_989024065_n

It actually came out even better than I had hoped. I made ghost pancakes, ghost bananas and an fruit bowl made out of an orange with a jack-o-lantern carved into it. I really love how everything turned out. For the pancakes I prepared the batter then put it into a Wilton squeeze bottle so I would have more control of the batter and be able to make the details for the ghosts. For the eyes and mouth I used Hershey’s milk chocolate chips. At first, I put the chocolate chips right in the pancake before I flipped them. I then I realized they were melting when they were cooking and you couldn’t even tell there were chocolate chips in the pancake. I figured out a better way to do it was to press the chocolate chips in when the pancakes were fully cooked and finished, but off the pan and cooling. The pancakes were still warm enough to slightly melt the chips into the pancake, but still hold their shape and make a nice face. The ghost bananas were so easy, I just cut the banana in half and again used the chocolate chips pressed into the banana for the eyes and mouth. For the orange jack-o-lantern I sliced a little bit of the orange peel off the bottom to make the orange be able to stand up. I then sliced a larger section out of the top and used my knife to slice into the orange diagnoally to remove the fruit from the inside and hollow it out. Once it was pretty clean inside I used a paring knife to carve the face. I sliced up some strawberries and filled the little bowl up. That was my favorite part of the whole breakfast. The kids really loved it and we all decided that this would be our new tradition and I would do this every year on Halloween for them. I can’t wait 🙂

12205023_10205587098780302_1934968535_n

After breakfast we just relaxed. Since Halloween was on a Saturday this year we had lots of time to kill before we went Trick-or-treating. We hung out in the living room, watched some Halloween movies and planned out our Trick-or-treat route! The boys took a nap so they would be charged up for the night and when they woke up we put on our costumes and headed out!

12200673_10205588398092784_1042171707_n

Collin wasn’t too thrilled when we wanted a picture, but he cheered up pretty quickly!

12200565_10205588850464093_1414572632_n

12200704_10205588852784151_250976619_n

12188813_10205588850704099_860003372_n

12200830_10205588849144060_180851435_n

12202580_10205588849864078_530508570_n


The kids got SO much candy, I can’t believe it. Bill and I both agreed it was just as much, if not more than we remember getting as kids! They had so much fun and even the boys seemed to really enjoy themselves. Halloween 2015 was one for the book for sure. Now, bring on the Christmas music!!! 🙂

XOXO-Kelly

Pumpkins Galore

As I told you before, my obsession for fall and Halloween is no secret. I milk this season for all its worth and this week we were all about pumpkins! Ashley decided she wanted to carve our pumpkin with a scary face, so I looked online for some inspiration, she picked the face she liked best and we got to work.

pumpkin

Pumpkin carving is absolutely one of my favorite past times. This year I put on a Halloween Pandora station and set everything up for us. Ashley was so excited and everything was perfectly festive. We had a great time and I love how our pumpkin turned out!

image1 image2

The next day we still had pumpkins on the brain, so I decided we would do some salt dough pumpkins! They are so easy to make and look incredibly adorable.

salt dough pumpkins

I mixed 1/2 cup of salt, 1/2 cup of flour and 1/4 cup of water. We kneaded the mixture until it formed a nice dough. If yours is too sticky, add a little more flour and if it’s too dry, add a little more water. This recipe worked really well for us and I didn’t need to add anything. Ash loved being able to help me add the ingredients and mix!

mix

rolling

I let her roll it out and she did a surprisingly good job! I finished it off to make sure it was about 1/4″ thickness.  prints

I pressed the kids hands into the dough and cut out a pumpkin shape (complete with a stem!) around the handprint. I had a little dough left over so I decided to make one with our cat’s paw print as well :). I baked them at 200º for about 3 1/2 hours. All the information I found said to bake for 3 hours but ours were still a little soft so I left them in a bit longer. We used acrylic paint from Michaels to paint them.

12178193_10205576057464276_1814196809_n

We painted the whole thing orange and then I used a small paintbrush to fill in the handprints with black. I really like the way the acrylic paint worked. It covered the pumpkins well with only one coat and dried nicely with no bumps or creases.

12179608_10205577156211744_2067112272_n

I added some green for the stem and voila! I’m going to add some Halloween ribbon and hang them up. I think they are so cute, it’s going to be hard to put them away after the holiday! I made another batch to make a set for my mom and my mother-in-law. I’m going to wrap them up and attach a cute card saying “From your 3 little pumpkins!” I know it will be a huge hit. What are your favorite fall crafts? I’d love some ideas for what to make next!

XOXO-Kelly

DIY Uncrustables

uncrustable

A few weeks ago we went on a playdate and Ashley had a peanut butter and jelly Uncrustable for lunch. Since then, she’s been talking about it nonstop. So when we were food shopping and she spotted the box in the freezer she about lost her mind. I picked it up and was less than thrilled with all the ingredients. I’m pretty picky with what my kids eat and I just couldn’t justify buying those adorable, but preservative filled little sandwiches. I was determined to find a different way. I came home and started to experiment. I tried just cutting the crust off and pinching the sides shut with a fork, but Ash wasn’t having it. The next day a food store by us was going out of business and had all their merchandise marked down to 95% off. I decided to check it out and when I walked in what is the first thing I see? The Wonder Seal’r N’ Decruster!

!12179012_10205554739851349_1670799427_n

I was SO excited. What made things even better was the fact that I was able to purchase this awesome tool for .54 cents! As soon as I got home I made a sandwich with it and Ashley was ecstatic! I was able to use the bread we like, along with our organic peanut butter and jelly. I loved being able to control the exact ingredients of the sandwich all while pleasing my 5-year-old! The Seal’r n’ Decruster cut the crust off neatly and sealed the edges perfectly. The sandwiches stayed sealed and even the boys were clean when they were done with their sandwich. I have used this so many times since we got it! I plan on making a bunch to freeze, which will be so easy to do. Just make the sandwich, wrap in foil and put in a freezer safe bag or food storage container. SO simple! I’d call this a Mommy win!

XOXO-Kelly